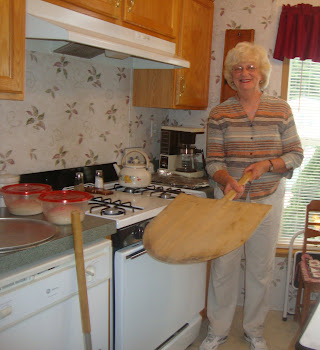
The beauty of Nancy Silverton's Pizza Dough is that she went about creating it from a bread baker's perspective stemming from her beginnings at L.A.'s La Brea Bakery. Her goal for the pizzas at Mozza was to create a dough with an open hole structure, where the just baked crust was full of big, irregular air pockets, giving it an airy cornice (or outer rim). For The Mozza Cookbook, Silverton tweaked her dough recipe used in the pizzeria for home cooks (those of us who don't have the luxury of a high heat wood-fired pizza oven).
If you want to read more, the article was on slice.seriouseat.com posted by Caroling Russock at
http://www.seriouseats.com/recipes/2011/10/nancy-silvertons-pizza-dough-recipe.html
Adapted from The Mozza Cookbook by Nancy Silverton with Matt Molina and Carolynn Carreño. Copyright © 2011.
INGREDIENTS serves enough dough for 6 single serving (12 inch) pizzas, active time 1 hour, total time 4 hours
22 ounces warm tap water (2 cups, 6 ounces)
1/2 ounce (1 tablespoon) compressed yeast or 1 teaspoon active dry yeast
26 ounces unbleached bread flour, plus more as needed
1/2 ounce (1 tablespoon) dark rye flour or medium rye flour
1 1/2 teaspoons wheat germ
1 1/2 teaspoons barley malt or mild-flavored honey, such as clover or wildflower
1/2 ounce (1 tablespoon) kosher salt
Olive oil, grapeseed oil, or another neutral flavored oil, such as canola oil, for greasing the bowl
PROCEDURES
1
To make the sponge, put 15 ounces of the water and the yeast in the bowl of a standing mixer and let it sit for a few minutes to dissolve the yeast. Add 13 ounces of the bread flour, the rye flour, and the wheat germ. Stir with a wooden spoon to combine the ingredients. Wrap the bowl tightly in plastic wrap and tightly wrap the perimeter of the bowl with kitchen twine or another piece of plastic wrap to further seal the bowl. Set the dough aside at room temperature (ideally 68 to 70°F) for 1 1/2 hours.
2
Uncover the bowl and add the remaining 7 ounces of water, the remaining 13 ounces of bread flour, and the barley malt. Fit the mixer with a dough hook, place the bowl on the mixer stand, and mix the dough on low speed for 2 minutes. Add the salt and mix on medium speed for 6 to 8 minutes, until the dough starts to pull away from the sides of the bowl. Note that the dough will not pull so much that it completely cleans the bowl, but if the dough is too sticky and is not pulling away from the sides at all, throw a small handful of flour into the bowl to make it less sticky. While the dough is mixing, lightly grease with olive oil a bowl large enough to hold the dough when it doubles in size. Turn the dough out of the mixer into the oiled bowl. Wrap the bowl as before. Set the dough aside at room temperature for 45 minutes. Dust your work surface lightly with flour and turn the dough out onto the floured surface. Acting as if the round has four sides, fold the edges of the dough toward the center. Turn the dough over and return it, folded side down, to the bowl. Cover the bowl again with plastic wrap and set it aside for 45 minutes.
3
Dust your work surface again lightly with flour and turn the dough out onto the floured surface. Divide the dough into six equal segments, each weighing approximately 7 ounces. Gently tuck the edges of each round of dough under itself. Cover the dough rounds with a clean dishtowel and let them rest for 5 minutes.
4
Lightly flour your hands and use both hands to gather each round of dough into a taut ball. Dust a baking sheet generously with flour and place the dough rounds on the baking sheet. Cover the baking sheet with the dishtowel and set them again at room temperature for 1 hour to proof the dough. (Or leave the dough on the counter to proof instead.)
5
To make the pizzas: Choose the pizza(s) you want to make and prepare all of the necessary ingredients.
6
Remove the oven racks from the oven and place a pizza stone on the floor of the oven. A pizza stone absorbs and distributes heat evenly, which helps you achieve a crisp crust. Buy a quality stone that will not crack from extreme heat. In a pinch, use the underside of a thick baking sheet.
7
Preheat the oven and stone to 500°F, or as hot as your oven will go, for at least 1 hour.
8
Create a pizza station that includes bowls full of olive oil, kosher salt, and the ingredients necessary to make the pizzas you have chosen.
9
Have a bowl of flour ready for dusting your countertop.
10
Have a bowl of semolina ready for dusting your pizza peel, a tool with a long handle and a large, flat metal or wood surface for sliding your pizzas in and out of the oven.
11
When your dough is ready, generously flour your work surface and place one round of dough in the center of the floured surface. Dust the dough lightly with flour. (If you haven't already, right about now you'll want to pour yourself a glass of wine.)
12
Using your fingertips as though you were tapping on piano keys, gently tap the center of the dough to flatten it slightly, leaving a 1-inch rim untouched.
13
Pick up the dough, ball both your fists, and with your fists facing your body, place the top edge of the dough on your fists so the round stretches downward against the backs of your hands, away from them.
14
Move the circle of dough around your fists like the hands of a clock so the dough continues to stretch downward into a circle.
15
When the dough has stretched to about 10 inches in diameter, lay it down on the flour-dusted surface.
16
Brush the rim of the dough with olive oil and sprinkle kosher salt over the surface of the dough.
17
Dress the pizza according to the recipe you have chosen, making sure to leave a 1-inch rim with no sauce or topping around the edge.
18
Dust a pizza peel with semolina and slide the pizza peel under the pizza with one decisive push. You are less likely to tear or misshape the dough with one good push of the peel rather than several tentative pushes. Reshape the pizza on the peel if it has lost its shape. Shake the peel gently to determine weather the dough will release easily in the oven. If it is sticking to the peel, carefully lift one side of the dough and throw some more semolina under it. Do this from a few different angles until there is semolina under the entire crust.
19
Open the oven door and slide the dough onto the preheated pizza stone. Again, moving decisively, pull the peel toward you to leave the pizza on the stone.
20
Bake the pizza until it is golden brown and the cornice, or rim, is crisp and blistered, 8 to 12 minutes. Cooking times may vary according to the power of your oven.
21
While the pizza is in the oven, clear a space on a clean, dry cutting board or place an aluminum pizza round on the counter to put the baked pizza on.
22
When the pizza is done, slide the peel under the crust, remove it from the oven, and place it on the cutting board or round.
23
Use a rolling pizza cutter to cut the pizza. We cut ours in four wedges at the Pizzeria, but for parties we often cut them into six or eight wedges so that each guest can get a slice of pizza while it is hot.
24
Make another pizza.
Norma