This video is of Steve finishing opening the dough on a Preferment Lehmann Dough pizza, saucing the pie, putting mozzarella on the pie, and sliding it into the deck oven at market.
http://www.youtube.com/watch?v=_NY73hZTQGA
Norma
Pizzas

Preferment for Lehmann Dough Pizzas
Crust of Pizza

Rim of Preferment Lehmann Formula
Sicilian Pizza

Sicilian Pizza with Preferment for Lehmann Dough
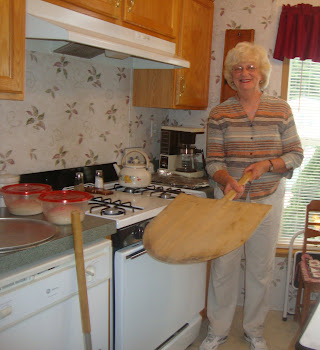
At my mom's home getting ready to bake in her gas oven
click on picture to go to post
Saturday, November 13, 2010
Video of Steve Finishing Pizza in Oven
This video is of Steve finishing the same pie in the oven.
http://www.youtube.com/watch?v=VzEs2YSUrYU
Norma
http://www.youtube.com/watch?v=VzEs2YSUrYU
Norma
Video of IR Gun Measuring Oven Temperature and Taking Pizza out of Oven
This video is of using an IR gun in the oven to measure temperatures and Steve taking the pie out of the oven with a metal peel.
http://www.youtube.com/watch?v=AdSZrtZcMJ0
Norma
http://www.youtube.com/watch?v=AdSZrtZcMJ0
Norma
Me Trying to Throw the Pizza Dough :(
This video is me carrying on trying to throw the dough. I am not good at throwing pizza dough, but at least I had fun. This video was shot sideways, just like me. LOL
http://www.youtube.com/watch?v=9XWl5GSI58k
Norma
http://www.youtube.com/watch?v=9XWl5GSI58k
Norma
Video of "Earth Day" Pizza Fusion Contest
This video is of the Pizza Fusion “Earth Day” pizza contest I entered. I sure was nervous and couldn’t remember what I wanted to say. I generally made a mess of this video, but at least my mother was able to successfully take this video. A Big “thanks” to my mother! I was never good at public speaking. LOL All the vegetables were purchased at Root's Market for this pizza.
http://www.youtube.com/watch?v=TaUryL0Nhig
Norma
http://www.youtube.com/watch?v=TaUryL0Nhig
Norma
Pizza Peels
If you have been using other ways to get a pizza into the oven, that is fine. If you find yourself making more pizzas than a few then I find pizza peels do help with sliding a pizza into the oven
I only give examples of where to find pizza peels or other equipment you might need for making pizzas. I am in no way affiliated with the Web Restaurant Store. I am using them as an example of the kind of equipment to look for in your area or on the web.
When using a pizza peel, the peel should at least be as big as the size pizza you are making. Example, if you are making a 12" pizza then you should at least have a 12" width and 12" height pizza peel.
I used wooden pizza peels to slide my pies onto the pizza stone. Then I use metal pizza peels to take them out of the oven. The peel used to take the pizza out of the oven doesn’t have to be as big as the pizza, because the bottom of the pizza will have then set and a smaller peel can be used. I also use a metal peel to rotate the pie while it is in the oven. If one side is baking faster than the other side, then you need to rotate the pie. These kinds of peels are only needed if you are going to be making round pies, not Sicilian or other pizzas baked only on a screen, deep-dish pan or another kind of pan. If using the latter kind of pans then a big spatula or even tongs can rotate the pie. You can even take the latter kinds of pies out of the oven or rotate with either oven gloves or pot holders. Just be careful because your oven will be hot.
I do put either flour, rice flour, semolina, or cornmeal on the wooden peel before I place the skin of the pie on the peel. It makes it easier to then slide the pie into the oven. I am not saying to use the kind of flour I like the best, but I like rice flour to flour my wooden peel with. You can experiment and also find what kind of flour you prefer.
These are what wooden and metal pizza peels look like.
Wooden Peels, please scroll down.
http://www.webstaurantstore.com/search/wooden%20pizza%20peels.html
Metal Pizza Peels, please scroll down.
http://www.webstaurantstore.com/search/metal%20pizza%20peels.html
You can also put in the search box, what you are looking for to get an idea what pizza peels look like or even type other kinds of pizza equipment at http://www.webstaurantstore.com/
Norma
Friday, November 12, 2010
Forming Dough Balls for A Pizza
This video was taken awhile ago, but it does show how to form dough balls. This video was taken at my small pizza stand at Root’s Market. I oil my dough balls and put them into plastic bags. If I am making dough balls at home, I oil the dough ball and put it into plastic containers with a lid.
Norma
Pizza Stones
To make a decent NY style pizza or other styles of pizza, except Sicilian, a pizza stone is very helpful in helping to have a final product that is more like a pizzeria. There are many kinds of pizza stones. Some people buy Fibrament stones. They are okay and fairly cheap. Many people use these stones, but many people find these stones do break after awhile. Cheaper stones can crack very easily. Some better Fibrament Stones are like these in this link. http://www.bakingstone.com/order.php Much cheaper Fibrament pizza stones can be found.
Unglazed quarry tiles are very cheap and if you go this route, make sure to measure your oven to make sure you can fit the tiles in the oven. I never baked on quarry tiles, so I am not sure how they bake, but others recommend quarry tiles for baking a pizza. A good pizza stone to use for baking pizza is Cordierite. They should a least be 3/4"-1" thick. I started using a Cordierite baking stone when I starting making pizza at home. They are very good pizza stones. These can be purchased at the Web Restaurant Store, other places on the web or maybe nearer where you live. http://www.webstaurantstore.com/ http://www.webstaurantstore.com/search/pizza%20stones.html
You can make your pizzas on a pizza screen like is pictured here, if you don’t want to first purchase a pizza stone, but if you are serious about making pizza, a pizza stone is better. http://www.webstaurantstore.com/fourth941/products/pizza-screens-regular.html Pizza
Pizza screens can also be used to start your pizza until it is set, and then transferred onto a pizza stone to finish baking. This is the way I started out when making pizza. I couldn’t get the pizza in the right shape by hand forming it. I started by trying to open the dough on a screen and then when the pizza was set in the oven, took it off the screen with a metal pizza peel and placed it on the pizza stone. A pizza screen can also be used if you want a larger pizza than your stone is. You can start the larger pizza on the screen and then transfer it onto the stone to finish baking.
I also make pizzas on firebricks on my propane gas BBQ grill and have tried soapstone. Soapstone retains the heat for longer periods, but isn’t superior, in my opinion, unless you can get high temperatures in your home oven. My home oven can only go to about 500-525.
I have found I like the Cordierite baking stone the best for my home oven use. I have a 16" stone.
A deep-dish pizza pan doesn't need a pizza stone to bake the pizza. You can use the deep-dish pan for Deep-Dish Sicilian, Deep-Dish Chicago or other pies.
Picture of deep-dish pan, firebricks on BBQ grill, deep-dish pan, BBQ grill set-up and Cordierite stone


Unglazed quarry tiles are very cheap and if you go this route, make sure to measure your oven to make sure you can fit the tiles in the oven. I never baked on quarry tiles, so I am not sure how they bake, but others recommend quarry tiles for baking a pizza. A good pizza stone to use for baking pizza is Cordierite. They should a least be 3/4"-1" thick. I started using a Cordierite baking stone when I starting making pizza at home. They are very good pizza stones. These can be purchased at the Web Restaurant Store, other places on the web or maybe nearer where you live. http://www.webstaurantstore.com/ http://www.webstaurantstore.com/search/pizza%20stones.html
You can make your pizzas on a pizza screen like is pictured here, if you don’t want to first purchase a pizza stone, but if you are serious about making pizza, a pizza stone is better. http://www.webstaurantstore.com/fourth941/products/pizza-screens-regular.html Pizza
Pizza screens can also be used to start your pizza until it is set, and then transferred onto a pizza stone to finish baking. This is the way I started out when making pizza. I couldn’t get the pizza in the right shape by hand forming it. I started by trying to open the dough on a screen and then when the pizza was set in the oven, took it off the screen with a metal pizza peel and placed it on the pizza stone. A pizza screen can also be used if you want a larger pizza than your stone is. You can start the larger pizza on the screen and then transfer it onto the stone to finish baking.
I also make pizzas on firebricks on my propane gas BBQ grill and have tried soapstone. Soapstone retains the heat for longer periods, but isn’t superior, in my opinion, unless you can get high temperatures in your home oven. My home oven can only go to about 500-525.
I have found I like the Cordierite baking stone the best for my home oven use. I have a 16" stone.
A deep-dish pizza pan doesn't need a pizza stone to bake the pizza. You can use the deep-dish pan for Deep-Dish Sicilian, Deep-Dish Chicago or other pies.
Before I purchased a baking stone I mostly made Sicilian pizzas. They are also good.
Norma
Picture of deep-dish pan, firebricks on BBQ grill, deep-dish pan, BBQ grill set-up and Cordierite stone


Thursday, November 11, 2010
I am sorry
I am sorry for not having links in my past posts. Since I am new to blogging, I am just learning how to blog and now have just discovered how to post links, so people can be helped by these links in trying to make pizza. I will continue to learn how to blog, and hopefully my blogging will get better. Sorry for my bad English and bad writing, but I was brought up in a Pa. Dutch backround and it shows in my writing style. I will slowly edit all my previous posts to include links.

Norma
Norma
Tom Lehmann's NY Style Dough
Tom Lehmann is an instructor at The American Institute of Baking, in Kansas He is also a moderator on PMQ think tank. http://pmq.com/tt/ Tom Lehmann dough recipe is on the recipe bank of the PMQ site. http://www.pmq.com/tt2/recipe/view/id_151/title_New-York-Style-Pizza/ along with other recipes. http://www.pmq.com/tt2/recipe/
Pete-zza (Peter) the one moderator on http://www.pizzamaking.com/forum/index.php proposed to Tom Lehmann about possible ways for converting pizza dough (NY style Tom Lehmann’s) for home use, since home equipment differs from commercial pizza equipment.
You can make a Lehmann pizza dough is a matter of hours or let it cold ferment in the refrigerator for a number of days. In my experience letting the refrigerator do the work of slow fermenting the dough does give better flavors to the crust of a pizza.
When making a Lehmann dough there are many variations of hydrations, flours to be used, yeast amount, to add or not add oil, some may add sugar, and some may also add oil.
When I usually make a Lehmann dough, I usually used high-gluten flour, IDY, water, salt and oil. You would be surprised to know how each ingredient can change how the final pizza is by using different amounts of the ingredients, I have just listed. You don’t have to use high-gluten flour. Bread flour will also make a decent pizza.
A finished dough temperature of 80-85 degrees F, is what is desirable to be able to cold ferment the pizza dough, in a commercial setting. Sometimes in home setting a desirable temperature of the final dough might be about 75-80 degrees F.
Tom Lehmann dough with sugar is optional. If you bake on a pizza screen, you can include sugar in a Lehmann dough, but a Lehmann dough doesn't need any sugar added if the ferment time isn't too many days. If baking on a stone you might find your bottom crust might brown prematurely, if adding sugar Equipment at home can differ from commercial pizza equipment.
There is a Lehmann Dough Calculating Tool on pizzamaking.com. If you go to http://www.pizzamaking.com/
home page, your will see it there. From the Lehmann calculating tool, you can put any amounts of ingredients into the tool and come up with a dough formula. It is under Dough Tools. http://www.pizzamaking.com/dough_calculator.html Main menu for pizzamaking.com http://www.pizzamaking.com/
Norma
Wednesday, November 10, 2010
A Big Thanks to Everyone that has helped me on my Pizza Making Journey!
Before I post more on this blog, I would like to personally thank everyone that has helped me on my pizza making journey. I first have my parents to thank, because they raised me to strive for whatever goals I want to try and achieve. They always told me to “shoot for the stars”. Everyday they are still an inspiration for me. My father passed away over 14 years ago, and not a day goes by that I don’t remember something he taught me or the way he raised me. I am very fortunate to still have my mother around. She continues to support me in whatever I want to try and just stopped helping me at my pizza stand this summer, when the weather became too warm.
I also have my children to thank. I am blessed to have such great children. I also want to thank my granddaughter that I raised. She had helped my husband and myself at market since she was 5 years old. She didn’t know what she was getting herself into, when she said she didn’t want to go to the babysitter’s anymore. She continued to help me, until she graduated from high school this past June. She is also a very special person to me. I only have one brother and he is also special. I don’t get to see him that often, because he lives in Colorado, but when he is here to visit, he is also an inspiration to me.
I also have all the great members on pizzamaking.com to thank. Without them, I never would have been able to make any decent pizzas. They have also been a great inspiration to me in all the posts they do and all their great pictures they show of their pizzas. I wanted to thank Steve, too, the administrator of pizzamaking.com, because if he hadn’t started the forum, no one would know how easy it would be to make great pizzas. All the moderators at pizzamaking.com are very knowledgeable, too. They are always helping someone achieve their goals. I am amazed the moderators do this all for free. Much thanks to all of them! I am on the PMQ think tank forum. I don’t contribute much to that forum, because I am just a small pizza stand and don’t really know as much as members there know about operating a big pizza business. Tom Lehmann, is a moderator at PMQ. He also has helped me many times. He has given his advice freely to me many times. Some of the pizza doughs I make are named after him.
I can’t forget that the great men, I have mentioned before that paved the road to understanding dough more. Without them, I don’t think I would have been able to figure out any of what goes into making pizza dough. They studied bread, but bread and pizza dough almost go hand in hand.
My friends have helped me along my journey, too. I have one great pizza making buddy (Steve), that also has taught me a lot about making pizza. He has also let me bake in his WFO. That was the first pizza I ever tried in a WFO. It was amazing!
Thanks to everyone that has taken me on this journey and continues to help me in my journey. My hat is off to all of them. I know people must get sick of me talking about pizza, LOL
Norma
Newbies introduction to learning NY style pizzas
In this post I will write some about making a NY style pizza. When using formulas for a 16" pizza, they can usually be made into two 12" pizzas. This should be kept in mind if you have a smaller pizza stone or want to make individual pies. A dough recipe can also be cut in half to make dough for a 12" pizza. In my opinion if you really want to taste a pie above what you are purchasing at you local pizzeria, you will find that pizzas made at home are better than what you can purchase. It is all about the “magic” of pizza dough. Usually regular pizzerias really aren’t that careful about their measurements of ingredients that go into pizza dough and usually don’t cold ferment their dough for very long. Most chain pizzerias now have dough balls that are made at central locations and then trucked to their individual stores. This is why I think that dough made at home makes a better pizza. You can choose your ingredients and make a much fresher pizza.
If you decide to purchase a digital scale, make sure it has a zero function and can measure in metric units. My digital scale can only measure to the gram, not parts of a gram.
Yeast amounts for most NY style pizzas made in a home are around 0.25% to about 0.40%. It all depends on the season of the year and what amount of time you want to cold ferment your pizza dough. Use lower values of yeast if you make the pizza in the summer and higher amounts of yeast if you want to use the pizza dough sooner, or possibly in the winter, when ambient temperatures are colder.
This was a modified NY style pizza dough formula for pizzzzagirl on pizzamaking.com from Pete-zza It is fairly easy to follow.
Pizzzzagirl's 12-inch Lehmann NY Style Dough Recipe
100%, Bread flour, 7.15 oz. (202.03 g.), (1 1/2 c. plus 2 T. plus 5/8 t.)*
63%, Water (at around 100 degrees F), 4.50 oz. (127.65 g.), (1/2 c. plus 2 t.)
1%, Oil, 0.07 oz. (2.03 g.), (a bit less than 1/2 t.)
1.75%, Salt (table salt), 0.13 oz. (3.55 g.), (a bit over 5/8 t.)
0.40%, IDY (instant dry yeast), 0.03 oz. (0.81 g.), (a bit over 1/4 t.)
Total dough weight = 11.88 oz. (336.66 g.)
Thickness factor (TF) = 0.105
Measure out the flour by first stirring the flour in the flour container and then repeatedly lifting the flour from the flour container into the measuring cup(s) and leveling off the flour in the measuring cup(s) with a flat edge (this is the "Textbook" method)
TF, or thickness factor is how thick or thin you want to make your pizza. A good range for making NY style is around 0.10. It can go up or down, all depending on how thick or thin you want your NY style pizza to be.
I will post pictures of what dough balls should look like at various stages and also my first formula for the NY style Lehmann dough I made, when I first started making pizza, in future posts.
Norma
If you are a Newbie to Making Pizza Dough
If anyone is interested in following this blog or trying to make their own pizzas at home, I will try to share what I have learned so far in trying to make a decent pizza. It isn’t necessary to have a digital scale, but your results could be better if you have access to a digital scale. This is especially important when weighing the flour and water. A digital scale isn’t that expensive and I bought mine for about 30.00. I first started out not using a digital scale and quickly learned if I want to produce a better pizza, a digital scale is very helpful. A pizza stone is also very helpful, if you want to produce a NY style pie. I will blog more about types pizza stones later. You don’t need any kind of mixer, if you don’t have one. I had mixed all of my pizza doughs at home by hand for a many months, until I bought a Kitchen Aid mixer. Mixing dough by hand is fairly easy. There are many kinds of yeast to use in pizza dough. I mostly use IDY (instant dry yeast) in pizza doughs. It can be found at your local grocery store. When using ADY (active dry yeast), it is helpful if it is hydrated into warmer water before using it with the flour, but I haven’t always hydrated the ADY with water. Basically I just mix the IDY into the flour, blend the flour (can have the salt added to the flour also) with water. If I use oil (vegetable, olive oil, or other oils, usually they are saved until the last ingredient to be added. First add salt and IDY on separate sides on the flour, then add the water, continue mixing until dough is mixed together and looks kind of shaggy or somewhat like a cottage cheese appearance, then add the oil. This will make the dough mixture a little sticky at first, but it will then come together after mixing for a little while. Then form a ball. Make sure to pinch the bottom of the dough ball together. Failing to do this, can make the bottom of the crust have weak spots. If you let your dough ball sit at room temperatures for a little while, the dough will become more relaxed. At this point you can reball the dough ball and place it into the refrigerator for a day or longer, all depending how much yeast you have added to your dough. When the dough ball has at least doubled in size, it can then be ready to make a pizza. Another thing to look for in the dough ball is bubbles on the bottom of the container you stored the dough ball in. Bubbles tell you how the dough is fermenting. I usually use plastic food containesr at home, that you can see though, to monitor the dough. Be sure to have a snap-on lid. If you don’t use some kind of covered container, the dough ball can dry out.
I will blog more later about opening a dough ball, flouring the peel, (used to slide the pizza skin into the oven) and using different rack positions and different temperatures in your oven).
Norma
I will blog more later about opening a dough ball, flouring the peel, (used to slide the pizza skin into the oven) and using different rack positions and different temperatures in your oven).
Norma
Monday, November 8, 2010
Greek Pizza Steve Made
Greek Pizza Steve tried with formula from pizzamaking.com
Steve, my pizza making buddy, tried this recipe for a Greek Pizza and in my opinion this pizza with the crispy edges and soft (a little crunchy crust), did turn out to be delicious. He used a combination of mozzarella and mild white cheddar for the cheese dressings for this pie. There was mostly mild white cheddar cheese on this pie with a little mozzarella.
100%, High-gluten flour (KASL), 9.37 oz. (265.46 g.), 2 1/4 c.
63%, Water*, 5.90 oz. (167.24 g.), a bit less than 3/4 c.
2%, Sugar, 0.19 oz. (5.31 g.), 1 1/3 t.
1%, Oil (extra virgin olive oil), 0.09 oz. (2.65 g.), a bit over ½ t.
1.75%, Salt, 0.16 oz. (4.65 g.), a bit less than 7/8 t.
0.40%, Instant dry yeast (IDY), 0.04 oz. (1.06 g.), a bit over 1/3 t.
*Temp. adjusted to achieve a finished dough temperature of 75 degrees F
Thickness Factor (TF) = 0.11
Finished dough weight = 15.75 oz. (446.38 g.)
Pizza size = 13 ½ inches (the diameter of the cutter pan bottom)
One recipe for an Emergency Dough for Newbies
For anyone that wants to try making their own pizza, there are many formulas in volume measurements and Baker’s percents at pizzamaking.com This is one formula for an emergency dough to be used in a few hours. This could be tried with Pillsbury bread flour, King Arthur Bread Flour or flours.
Tom Lehmann "Emergency" Dough Recipe for Newbies from pizzamaking.com
Ingredients:
Pillsbury Bread Flour - 3 cups unsifted
Salt - 2 teaspoons
Sugar - 1 ½ tablespoons
Yeast (active dry) - 1 package
Water (warm/100̊F) - 1 cup
Olive Oil - 2 tablespoons
How to Prepare:
1) Suspend yeast in the water, add a pinch of sugar and stir well. Set aside to activate for 10 minutes.
2) Place flour, salt, and sugar in a mixing bowl. Stir the yeast suspension and add to the ingredients in the mixing bowl.
3) Using a wooden spoon stir the mixture for 1 minute. Add the oil and continue mixing (stirring) until the dough becomes too thick to stir with the wooden spoon. (Generally 2 to 4 minutes).
4) Cover the bowl with foil, waxed paper, or damp towel and set aside to
Ferment for 1 to 2 hours. Punch the dough down as necessary to keep it in the bowl.
5) Turn the dough out onto a floured bench or counter top, knead the dough by hand for about 2 minutes, oil the mixing bowl, and place the dough back into the bowl for 15 to 30 minutes.
6) Turn the dough out again onto a lightly floured bench or counter top, using a knife or bench scraper, divide the dough into 3 equal pieces.
7) Lightly flour each dough piece, and roll out thin. Makes a 10-11 each diameter crust. If the dough tends to shrink back after rolling, set it aside for 10 minutes on a floured surface, and roll or stretch it by hand to fit a 10 to 11 inch pizza pan or stone.
8) Brush the edge of the crust with oil (olive), apply your favorite sauce, cheese, and other toppings, place the pan into the oven; or transfer the pizza using a pizza peel to the preheated pizza stone, and bake in a hot oven (center shelf) until the crust and cheese are lightly to golden brown in color.
Didier Rosada and Professor Raymond Calvel
I am going to blog a little about Didier Rosada and Professor Raymond Calvel. These are two great men, that have studied how flour, yeasts and other ingredients are used to make dough. Not specially pizza dough, but from their studies and teachings can tell us more about fermentation, yeast types, finished dough temperatures, gluten development, flours and all the other factors and chemical development in doughs can all come together to make the best dough you can possibly achieve.
Understanding all of this is difficult to understand, but when reading any of Didier Rosada’s or Professor Raymond Calvel's writings or anything that can be found on the web about their teachings, it all helps to understand what might be going on in any dough, be it pizza or bread dough.
I will blog more in the future about these great men that have written and studied so much. If you can understand even a little about their teachings, it can help you to achieve better dough.
Norma
Sunday, November 7, 2010
Learning how my tastes in Pizza have changed
Before I ever started trying to understand pizza and all what goes into making any kind of pizzas, I thought I had known what kinds of pizzas I liked. Pizza was always one of my favorite foods. I really like the combinations of crust, sauce, cheese and if there were other toppings on a pizza. Little did I know, that someday I wouldn’t like the same pizzas that I did before.. Now when I taste other pies, I try to first taste the crust to see if I think it is any good. My favorite pizza shops aren’t my favorite anyone, and as I explore other kinds of pizzas, I am finding there are more varieties of pizza I like. I had never tried a pizza made in a Wood Fired Oven before. When my pizza making buddy, Steve built one at his home, he was gracious enough to invite me to try some doughs in his WFO. I never would have imagined how different pies made in a WFO would be. Some of the pies only took 1 minute to bake. That was also fascinating to me. I love the smell of wood and love seeing the flames that are in a Wood Fired Oven. I want to thank Steve and his family for letting me be at their home and getting able to experience a Wood Fire Oven Pizza.
Norma
Norma
About Root's Country Market
History
ROOT'S Country Market & Auction is the Oldest Single Family Run Country Market in Lancaster County, Pennsylvania.
Established in 1925 by A.W. Root as a poultry auction, Root's Country Market & Auction has evolved to include a produce auction and 200+ standholders including fresh meats, deli, bakeries, nursery and flowers, handmade crafts, antiques, collectibles and household items of all kinds.
Root's is a traditional country market in Lancaster County and a part of the heritage of the Pennsylvania Dutch area.
Country markets and public auctions are a way of life in Lancaster County, Pennsylvania. Some stands at Root's are operated today by the second and third generations of family members who helped to start the market. The antique soft pretzel machine in use at the pretzel bakery was built by the current standholder's grandfather.
I invite you to visit Root's Country Market & Auction when you are in the area
Root’s Market website:
http://www.rootsmarket.com/
Root’s Old Mill Flea Market: Where many antiques and fine collectibes can be found
http://www.rootsoldmill.com/
On This page for Root’s, you can sign up for a newsletter for specials for just to find out what is happening at Root’s Country Market& Auction, Inc.
http://www.rootsmarket.com/orderinfo.asp
Norma
My Adventures in Starting my Small Pizza Stand..how it came about
Before I go much farther in this blog, I would like to explain how I got into pizzamaking and where I have my pizza stand.
I have gone to Root’s Market since I was a child. The market has grown over the years and is a very large market now. It is only opened on Tuesday’s year round. My late husbands parents started a Caramel Corn business at this market in 1928, in addition to operating other markets, being at fairs, and also operating at the late Rocky Springs Park, in Lancaster, Pa. When my husbands parents couldn’t operate their market stand, due to bad health, my husband took over the stand at Root’s Market, located in Manheim, Pa. He operated the Caramel Corn Stand in addition to working for various butchers in our area. He wanted to get away from working for butchers because he needed to work in very cold places and also wanted to be fully in business for himself. I had a full-time job at RCA and he wanted me to help him open other market stands, at other farmers markets. I was reluctant to leave my secure job at RCA, because I had good benefits and retirement. This was before my husband and I got married. I went with my husband for 5 years before we married. After I thought it over for awhile, I decided to join my husband in his quest to be in business for ourselves. I worked for an addition 2 years at my job at RCA, and helped him at Root’s Market and also a stand we purchased at Green Dragon Farmers Market in Ephrata, Pa. After I finally quit my job at RCA,(RCA then had changed to GE and finally Burle Industries, we opened another market stand in Morganstown, Pa. We also purchase a concession trailer to be able to go to fairs and festivals. The market stand in Morgantown, Pa. was a flop. Later on in my blog, I will post pictures of our stands at Green Dragon and Morgantown, Pa. Life was good at this point and we were really busy and growing in our businesses. We found out how to make clear toy candy and brittles. We sold these items in addition to fresh lemonade, fudge and other items. When my husband took a very bad fall at our home, he couldn’t work any longer. He had worked full-time up until the day he fell. He just tripped over a brick and fell into a cast iron trough, that held flowers in front of our home. From that fall he broke his neck and had to have feeding tubes a trach, developed MRSA and had so many other problems. My husbands favorite food was pizza. He like it in any way. I didn’t know how to make a decent pizza then. I don’t know how he did it, except that he was a strong person, but he couldn’t eat or drink for 2 ½ years. He was in and out of the hospital so many different times and also in nursing homes because his care was too great. We would have needed to have a full-time nurse at all times if he had been at home all the time. He was home different times, but his MRSA kept coming back and he would wind-up back in Intensive Care for a long while. I had to make a decision to sell our market stands, because I couldn’t run this business without my husbands help. I really hated to sell those stands, but that is the way life is. For awhile I tried to find another job, but since I was older, it was really hard finding a decent job. Finally about 8 months later, I found a Funnel Cake stand, with other food items at Root’s Market. I really liked running that stand, but could only have it open from March until November. I finally sold that stand and opened a Fresh Salsa Stand. I will put more pictures of that stand in this blog, in addition to my Funnel Cake stand. When I learned the manager of Root’s Market was looking for someone to have a fresh pizza stand, I thought I have done many things in the past, but sure didn’t know anything about making pizza. That is why I started the Pizza Stand.
More to follow...
Norma
Subscribe to:
Posts (Atom)