Welcome...

There are so many variables that go into making a PIZZA. The hydration of the dough, flour, yeast and many more.. Amounts of any kind of yeast in a pizza can make a big difference. Most recipes posted on the web, use too much yeast in their recipes. What I have found out so far, is either bulk fermenting the dough or cold fermenting the dough will give a better flavor in the crust. I am still experimenting to find different flavors in the crust of pies. In my opinion pizza is all about the best flavor you can achieve in a crust. I still am on the journey about flavors in the crust. Even differences in temperatures in you home or times of the year can influence how much yeast to use. If you want a pizza to develop flavors in the crust, there are many ways to go about achieving this.

Pizzas

Pizzas
Preferment for Lehmann Dough Pizzas

Crust of Pizza

Crust of Pizza
Rim of Preferment Lehmann Formula

Adventure in Pizza Making

There are many ways to go about trying to make any kind of pizzas you want to create. PIZZA making is fun and also you get to eat your finished product. I learned to make all my pizza on http://www.pizzamaking.com/forum/index.php If you look on pizzamaking.com you can see all the beautiful creations of pizzas members make on this site. Members and moderators help members and guests achieve almost any kind of pizzas they want to create. Since joining this site, my pizza making skills have gone from non-existent to something much better. I invite you to take a look at this site.

Total Pageviews

Sicilian Pizza

Sicilian Pizza
Sicilian Pizza with Preferment for Lehmann Dough

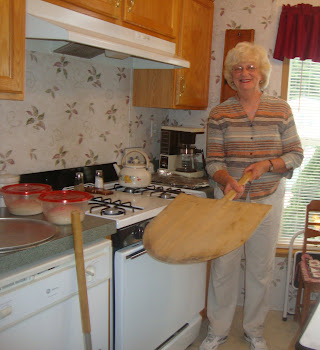
At my mom's home getting ready to bake in her gas oven

At my mom's home getting ready to bake in her gas oven
click on picture to go to post

Wednesday, February 2, 2011

Next attempt for a Pizzarium Pizza 2/2/2011

This was my next attempt 2/2/2011.  I was away, and when I came home the dough sitting on my kitchen table looked like it was too soft, so I gave it another stretch and fold and let it sit another hour.  I don’t think I left the dough relax enough after the stretch and fold, because I was in a hurry. I wanted to see what would happen with this dough if I left it proof after having it in the deep-dish non steel pan.  I left the dough proof with olive oil on the skin for 45 minutes, with a towel.  This pie did rise well while in the oven and stayed that way after I took it out of the oven, but I wanted to get this pie finished so I quickly dressed it.  I think I should have waited a little while before I dressed it, but I am not sure of that.  I then put the pie back into the oven until the cheese was melted.

Although this pie did taste good, I am still not satisfied with how this compares to the pie I had made at market before.

Norma


Preferment Lehmann dough with KASL, Spring Wheat Prairie Gold and Ground Pecans

I tried one  experimental preferment Lehmann dough ball with the leftover poolish from market.  I have a Cuisinart spice & nut grinder.  I used Spring Wheat Prairie Gold 10%  (23.45 grams) and ground pecans 10% (23.45) KASL 80% (187.6 grams) and added some extra water (120 grams) altogether in the mix, because the Prairie Gold and ground nuts did make the dough drier.  I used the same amount of poolish and the rest of the ingredients.  I mixed the dough yesterday and baked the pie this evening.  I ground the Prairie Gold and the pecans in my spice and nut grinder.

This was the most different crust I have tried so far.  It had a slight taste of pecans, which I thought tasted good.   I have tried Prairie Gold in a pie I made before in the basic Lehmann thread.

This pie was dressed with my regular tomato sauce, a blend of white cheddar and mozzarella, grape tomatoes that were slightly fried in olive oil with herbs, red and green peppers and after the bake a small amount of basil was placed in the middle of the pie.

Norma


Monday, January 31, 2011

Dairy Whey added to preferment Lehmann dough for better browning of the crust January 25, 2011

The preferment Lehmann dough ball with the added dairy whey was baked today into a pizza. The pizza did brown better with the dairy whey added.  The crumb was even moister with dairy whey added.  This dough ball did open easily.

This pizza did have much better browning than my other preferment Lehmann doughs without the added dairy whey.  The taste of the crumb was even better.

Peter posted this post on what dairy whey does in dough.

Norma,

We have been paying the most attention recently to the browning issue because that was the issue that was yelling at us the loudest. However, in addition to helping with crust coloration, dairy whey also affects the texture/structure and flavor of the baked goods in which it is used, and apparently has attributes like hygroscopicity (it attracts water from its surroundings) that helps retain moisture in the dough (and helps retard staling). I observed many of these other effects when I did my dairy whey experiments some time ago but I wasn't sure how pronounced they would be in a dough such as yours using a poolish preferment. However, I found a good, comprehensive discussion of the effects of dairy whey in baked goods in an article at

http://www.usdec.org/files/Publications/1BAKERY.pdf


If you read that article, even casually without trying to understand all of the science, I think you will have a much better idea as to the role that dairy whey plays in baked goods.

Peter

Norma


My Math Phobia and Peter Trying to Help me understand how to figure out things.

I have always had problems with math.  I don’t know if it is because I am dumb in math or what happens when I see numbers that are complicated.  Since I have been learning to make pizza, I always have trouble when there is something to figured out with math that has to do with pizza.
Peter (Pete-zza) recently helped with explaining more about what can go into formulas.  If I can ever get this all down, I will be a better pizza maker.  Who knows what time will do.  I am getting older and things don’t come as easily for me as when I was younger, especially the math, which I always had a hard time with.

This was how Peter explained how to do the math:

Norma,

To help you get over your math phobia, I will show you how to convert the dough formulation you referenced to baker's percent format and to calculate the thickness factor.

First, you have to convert all of the ingredients to baker's percent format. All baker's percents other than the flour, which is always 100% (by definition), are with respect to the weight of flour. So, for the formulation under discussion, if the weight of water is 720 grams, then its baker's percent is equal to 720/900, or 80%. Doing the same calculations for the rest of the ingredients will give you their respective baker's percents. The only wrinkle is the barley malt. Since the article apparently doesn't say whether the barley malt is dry or liquid, or whether it is diastatic or non-diastatic, I will assume that it is non-diastatic and liquid for our purposes, and intended as a sugar substitute. One teaspoon of a typical barley malt syrup weighs 0.2469135 ounces. To convert that to grams, multiply that number by 28.35 (since one ounce weighs 28.35 grams). That comes to 6.99999 grams for the single teaspoon of barley malt syrup. If you divide that number by 900, the baker's percent is 0.77776%.

Second, to use the expanded dough calculating tool at

http://www.pizzamaking.com/expanded_calculator.html


for data formatting purposes, you need to add up the weights of all of the ingredients. For the formulation under discussion, that is 1694.499 grams. That number should be used in the expanded dough calculating tool using the grams Dough Weight option. Then the baker's percents are entered into the tool. Doing all this yields the following:

Flour (W 250) (100%):
Water (80%):
CY (0.50%):
Salt (2%):
Extra Virgin Olive Oil (5%):
Non-Diastatic Barley Malt Syrup (0.77776%):
Total (188.27776%):
900 g  |  31.75 oz | 1.98 lbs
720 g  |  25.4 oz | 1.59 lbs
4.5 g | 0.16 oz | 0.01 lbs |
18 g | 0.63 oz | 0.04 lbs | 3.22 tsp | 1.07 tbsp
45 g | 1.59 oz | 0.1 lbs | 10 tsp | 3.33 tbsp
7 g | 0.25 oz | 0.02 lbs | 1 tsp | 0.33 tbsp
1694.5 g | 59.77 oz | 3.74 lbs | TF = N/A
Note: For three 30cm x 35cm trays; no bowl residue compensation

Third, to calculate the thickness factor, you first have to convert the dimensions of the tray to inches. The dimensions given for the tray are 30cm x 35cm. Since one inch is equal to 2.54 cm, if you divide 30 and 35 by 2.54, you will end up with 11.81" x 13.78". If you multiply those numbers together, you will end up with the surface area of the tray. In this case, it will be 162.7362 square inches. That number will be used to calculate the thickness factor. However, there is one step left. Since the total dough weight is intended to be used for three trays, we have to divide the total dough weight, in ounces, by 3. So, in our case, one tray of dough weighs 59.77 ounces (from the above table) and when that number is divided by 3 we get 19.9233 ounces.

Finally, to get the thickness factor, we divide 19.9233 by the surface area of the tray, i.e., 162.7362. That gives us the thickness factor of 0.12243. That value might change slightly if a dry non-diastatic malt were used, or if a diastatic malt were intended. The numbers would have to be re-run in such a case. However, now that I have shown you how to do the math, hopefully you would be able to do the math yourself in such a case.

For those who are interested, I used the Google translator at http://translate.google.com/#it|en|. I selected Italian to English and entered the URL of the article at

http://profumodilievito.blogspot.com/2009/11/la-pizza-in-teglia-croccante.html


into the translation box.

Peter

Thanks Peter for taking the time to explain to me what to do.

Norma

Pizzarium Attempt January 25, 2011

I used the dough I had made and posted about at Reply 274

http://www.pizzamaking.com/forum/index.php/topic,9946.msg124387.html#msg124387


This crumb was light and the crust did taste good.

I baked this in my deck oven at market in my steel deep dish pan at temperatures about 550-565 degrees F, first on two screens and then I took the pan off the screens, because the bottom wasn’t browning enough.  The bake time was about 10-12 minutes.  If you want me to post the other pictures I took, I can either post them under your thread here or at the other thread where I posted the formula and what I did to this dough.

None of my other attempts before turned out like this.  I still am not sure how a real Pizzarium slice is supposed to taste like or look like.

I will try to explain to you and anyone that is interested what I did to try and make the pizza I did.  When looking at the pictures I posted on Reply 275 at

http://www.pizzamaking.com/forum/index.php/topic,9946.msg124388.html#msg124388

it can be seen how the dough looked when it was finished being mixed in the first picture.  In the second picture the dough is in a smaller plastic container.  That dough was stretched and folded two times after 45 minute intervals.  In the third picture the dough had already been cold fermented overnight.  I had done a total of 6 stretch and folds the night before and had the dough out at room temperature for 3 ½ hrs., before placing it in the refrigerator.  The next morning, I took the plastic container out of the refrigerator and did more stretch and folds, for a total of 4 more.  That was over a period of 4 more hours.  Then the dough had reached the top of the smaller container.  I then the dough to market and left it in the deli case overnight.  When I arrived at market in the morning, the dough was almost pushing off the lid, so I moved the dough to a larger container.  I left the dough sit out at room temperatures at market, for about 7 hours.  The dough became very gassy as can be seen in Reply 299 at

http://www.pizzamaking.com/forum/index.php/topic,9989.msg124534.html#msg124534


That picture was taken about 2 ½ hrs. before baking the pizza.  That is the first picture in that posted.  The second picture is how the bottom of the dough looked right before the bake.  As can be seen in all those pictures the dough did grow by a lot.  I also think that it is critical to be able to tell when the dough is ready and not overproof it.  I wasn’t even sure I didn’t overproof the dough, until I baked it.  I did let the opened skin, proof more in the deep-dish steel pan for another about 1 ½ hrs., covered with linen towels.  Then I lightly coated the skin with herb infused oil.  The skin after proofing did seem dry, before brushing with oil.  The dough didn’t rise much while proofing.

The method I used to mix the dough was the method of mixing flour slowly into the water.  I spent about 40 minutes slowly mixing the flour in and trying to form more gluten.  The salt and oil weren’t added until the end of the mix.  When the dough was finished mixing, it looked very sticky.  After the salt was added in I could see the gluten tighten up.  I mixed on various speeds in my Kitchen Aid Professional HD mixer.  At some times I even tried the highest speed to see what would happen.  That is speed 10, but I didn’t keep the mixer on speed 10 for too long.  I used my hands that were wet with water to do the stretch and folds.  The dough became very robust from doing the stretch and folds.

I don’t know if these explanations can help anyone or not that want to make this kind of pizza.  I don’t even know if I can reproduce the same results the next time, but I probably will try again next week.  There is no way of knowing if I was doing anything right or wrong in what methods I used to mix or what I did after the mix.  I would have thought the dough was overproofed.  I also wonder how I could tell if the dough became overproofed.  I didn’t do any punch downs of the dough after it really began to rise.

I would like to be able to sell this kind of pizza at market, but some way it would have to be tried over and over to see what the results are.  In a home setting without being a professional with this type of pizza, there is too much watching of the dough and then not knowing how the final bake will be.  Maybe this dough could be cold fermented for more days to make this kind of dough easier to make.  If anyone has any ideas about anything I posted, let me know.  My formula was very similar to yours, Jose.  I also used sea salt in the formula.  I used olive oil in the formula, too.

Picture of Caputo flour used for 15% of mix in the flour and yeast I used in the formula.

Norma


Better for Bread flour subsitued for KASL in the Lehmann formula: January 26, 2011

This was the preferment Lehmann dough pizza, with the Better for Bread flour used instead of KASL.  This pizza did brown better and had more crisp in the crust.  The crumb wasn’t as moist as when using the dairy whey. The moistness in the crust was almost like my regular preferment Lehmann dough pizzas and this pizza did get better oven spring, than the last pizza I made at home. Although Steve and I did enjoy this pizza, the added dairy whey pizza, was better in both of our opinions.  I will have to do a few more tests on the Better for Bread flour in the preferment Lehmann dough.  These last three pizzas were thinner than my normal preferment Lehmann dough pizzas, because I now use a higher TF.  I used the formula for the last three pizzas using one dough ball that was set forth in this thread.

I wouldn’t have been able to make any of the pizzas or bread, if today was yesterday.  Instead of being on the pizza making detail, there would have been a shoveling detail.  When I awoke this morning this is what it looked like outside.  There is a winter storm warning, in our area until 1:00 pm tomorrow.  Looks like I will be on the shoveling detail today and tomorrow.

Norma